A dive into the Django admin (Part 1): Creating and Customizing Multiple Admin Sites.

A dive into the Django admin (Part 1)
The Django admin is one of Django’s most powerful features, enabling effortless data management within your application. However, as your project grows, you might find the need for multiple admin sites to better manage different aspects of your application, such as separating user management from order processing. In this article, we’ll explore how to create and customize multiple Django admin instances, ensuring a seamless and efficient administration experience.
So buckle up and let’s dive in.
Introduction to the Django Admin
Before we start working with the django admin let’s first make sure we are familiar with the admin.AdminSite class.
most people are familiar with the default admin site that comes with Django which is admin.site, but what most people don’t know is that the admin.site is an instance of the admin.AdminSite class.
The main functions we will override in the admin.AdminSite class in this article is:
- each_context: to add extra context to the admin site.
you can find more about the admin.AdminSite class from the source code here
Now that we are familiar with the admin.AdminSite class let’s dive into the first topic.
Note
Creating Multiple Django Admin Instances
Creating multiple Django admin instances is a straightforward process. You can create a new instance of the admin.AdminSite class and register the models you want to manage with that instance.
# Creating multiple Django admin instances
from django.contrib.admin import AdminSite
from myapp.models import orders  # Adjust 'myapp' to your app's name

class OperationsAdmin(AdminSite):
    site_header = "Operations Admin"
    site_title = "Operations Admin Site"
    index_title = "Operations Admin"
    site_url = ""

operations_admin = OperationsAdmin(name='operations_admin')
operations_admin.register(orders)
Now that we have created a new instance of the admin.AdminSite class and registered the orders model to it, we can now add the new admin site to the urls.
# in urls.py
from django.urls import path
from path.to.admin import orders_admin

urlpatterns = [
    ...
    path('operations-admin/', operations_admin.urls),
]
Now that we have added the new admin site to the urls, you can now access it by going to http://localhost:8000/operations-admin/.
Adding Navigation Between Admin Instances
To make it easier for the users to move between the different admin instances, we need to edit the each_context and the HTML of the base admin site template.
let’s start by creating a registry that will hold the different admin instances, this way we can manage the multiple admin instances in one place.
Admin Register Singleton
The AdminRegister class uses the singleton pattern to ensure that there’s only one instance managing all admin sites. This is crucial for maintaining a consistent registry and preventing conflicts.
from django.urls import path
from django.contrib.admin import AdminSite
# A singleton class to register admin sites
class AdminRegister(object):
    admin_sites = {}

    def __new__(self):
        if not hasattr(self, 'instance'):
            self.instance = super(AdminRegister, self).__new__(self)
        return self.instance

    def register(self, admin_site, icon, name, title, url)->None:
        admin_site.each_context = self.get_context_function(admin_site)

        self.admin_sites[admin_site] = {
            'icon': icon,
            'name': name,
            'title': title,
            'url': f'{url}/',
            'app': f'{admin_site.name}:index',
            'app_list_function': admin_site.get_app_list,
        }


    def get_url_paths(self)->list:
        paths = []
        for site, site_dict in self.admin_sites.items():
            paths.append(path(site_dict['url'], site.urls))
        return paths


    def get_admin_sites(self, request)->list:
        data = []
        request_url = request.get_full_path()
        request_url = request_url[1:] if request_url.startswith('/') else request_url

        for site, site_dict in self.admin_sites.copy().items():
            if site.has_permission(request):
                site_dict['apps_list'] = site_dict['app_list_function'](request) if request else None
                site_dict['current_site'] = request_url.startswith(site_dict['url'])
                data.append(site_dict)

        return data

    def get_context_function(self, admin_site):
        def each_context(request):
            context = super(admin_site.__class__, admin_site).each_context(request)
            context['admin_sites'] = self.get_admin_sites(request)
            return context
        return each_context
what we did here is that we created a singleton class that will hold the different admin instances and their data, and we added a method to register the admin sites and another method to get the admin sites data.
now let’s register the admin sites in the OperationsAdmin class.
# admin.py
  ...
  AdminRegister().register(operations_admin, 'fa fa-cogs', 'Operations Admin', 'Operations Admin Site')
now notice that we added the AdminRegister().register method to the OperationsAdmin class and we passed the admin site instance, the icon, the name, the title, and the url of the admin site.
also notice that we added the admin_site.each_context = self.get_context_function(admin_site) to the AdminRegister class to add the admin_sites to the context of the admin site.
and finally, we add the AdminRegister().get_url_paths() to the urls.
from django.urls import path

urlpatterns = [
    ...
] + AdminRegister().get_url_paths()
now that we have added the admin sites to the urls, we can now add the HTML to the base admin site template to show the different admin instances. first we will create a file in the templates/admin directory called base_site.html and add the following code.
{% extends "admin/base.html" %}
{% block userlinks %}
{{ block.super }}
<select onchange="window.location.href = this.value;">
  <option value="">Select a site</option>
   {% for site in admin_sites %}
       <option value="{{request.scheme}}://{{request.get_host}}/{{site.url}}"
          {% if site.current_site %} selected {% endif %}>{{site.name}}</option>
   {% endfor %}
</select>
{% endblock %}
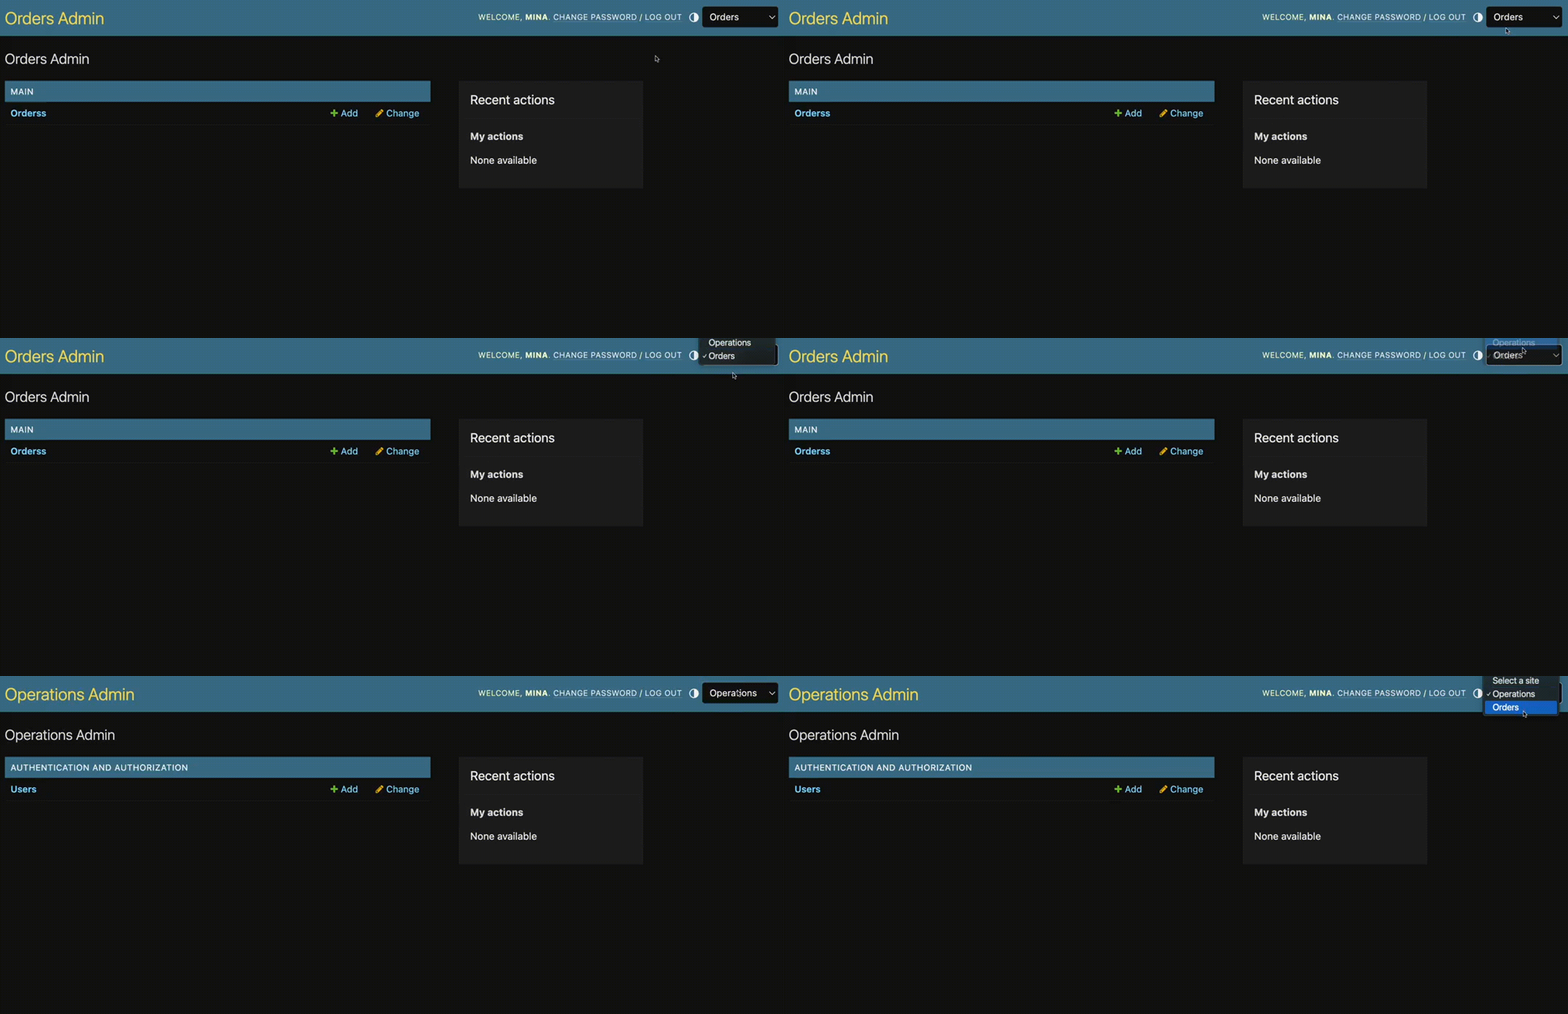
and that’s the the output of the code above.

Conclusion
In this article, we’ve explored how to create and customize multiple Django admin instances, allowing you to better manage different aspects of your application. In the next part of this series, we’ll dive deeper into advanced customization techniques and explore how to further enhance the Django admin experience. Stay tuned for more insights and tips on optimizing your Django admin sites.


